
SIP Trunks
Overview
A SIP trunk connects your PBX or voice platform to TextCall so you can place outbound calls and receive inbound calls on your DIDs over SIP.
Each trunk ties together the following:
| Concept | What it is |
|---|---|
| Trunk ID | A unique identifier that doubles as the SIP authentication username. |
| Password | The SIP authentication secret your PBX sends when it registers or places calls. |
| Plan | The voice rate plan that prices traffic on the trunk. |
| Application | The application that owns the trunk. The trunk is visible under that application's API key, and its usage is reported there. |
| DID numbers | Numbers whose inbound calls are routed to the trunk. |
Before you start
- A TextCall account with voice enabled. Accounts are provisioned by our team; see the Quickstart.
- At least one voice rate plan on your account.
- Voice product enabled at least on one application.
- At least one DID rented and assigned to the same application(s).
- A PBX or SBC that supports SIP digest authentication (for example, Asterisk, FreePBX, 3CX or FreeSWITCH).
Create a SIP trunk
You create a trunk in the portal in under a minute. Have your PBX details ready, because the Trunk ID and password you set here are the credentials your PBX will use.
- In the portal sidebar, go to Voice → SIP Trunks.
- Click Add SIP trunk in the top-right corner. The Add SIP trunk dialog opens.
- Complete the fields described in the table below.
- Click Save trunk. The new trunk appears in the Configured trunks list.
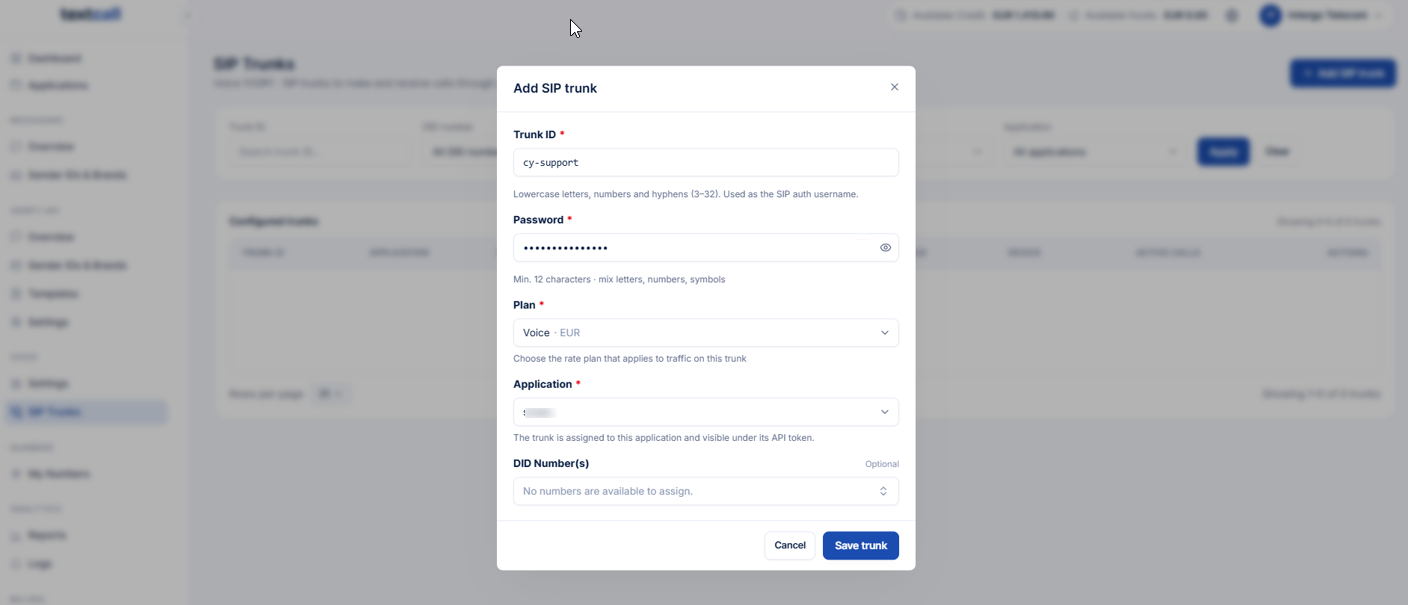
Field reference
| Field | Required | Rules and guidance |
|---|---|---|
| Trunk ID | Yes | Letters, numbers, and hyphens. Used as the SIP authentication username. Choose a name that identifies the site or purpose, such as cy-support or hq-pbx-01. |
| Password | Yes | Minimum 12 characters, with a mix of letters, numbers, and symbols. Use the eye icon to check what you typed. Store it in a password manager before you save. |
| Plan | Yes | The voice rate plan applied to all traffic on this trunk. |
| Application | Yes | The application that owns the trunk. The trunk is visible under that application's API key, and its usage is reported there. |
| DID Number(s) | No | Numbers whose inbound calls should reach this trunk. Only numbers in the selected application are listed. You can also assign DIDs later |
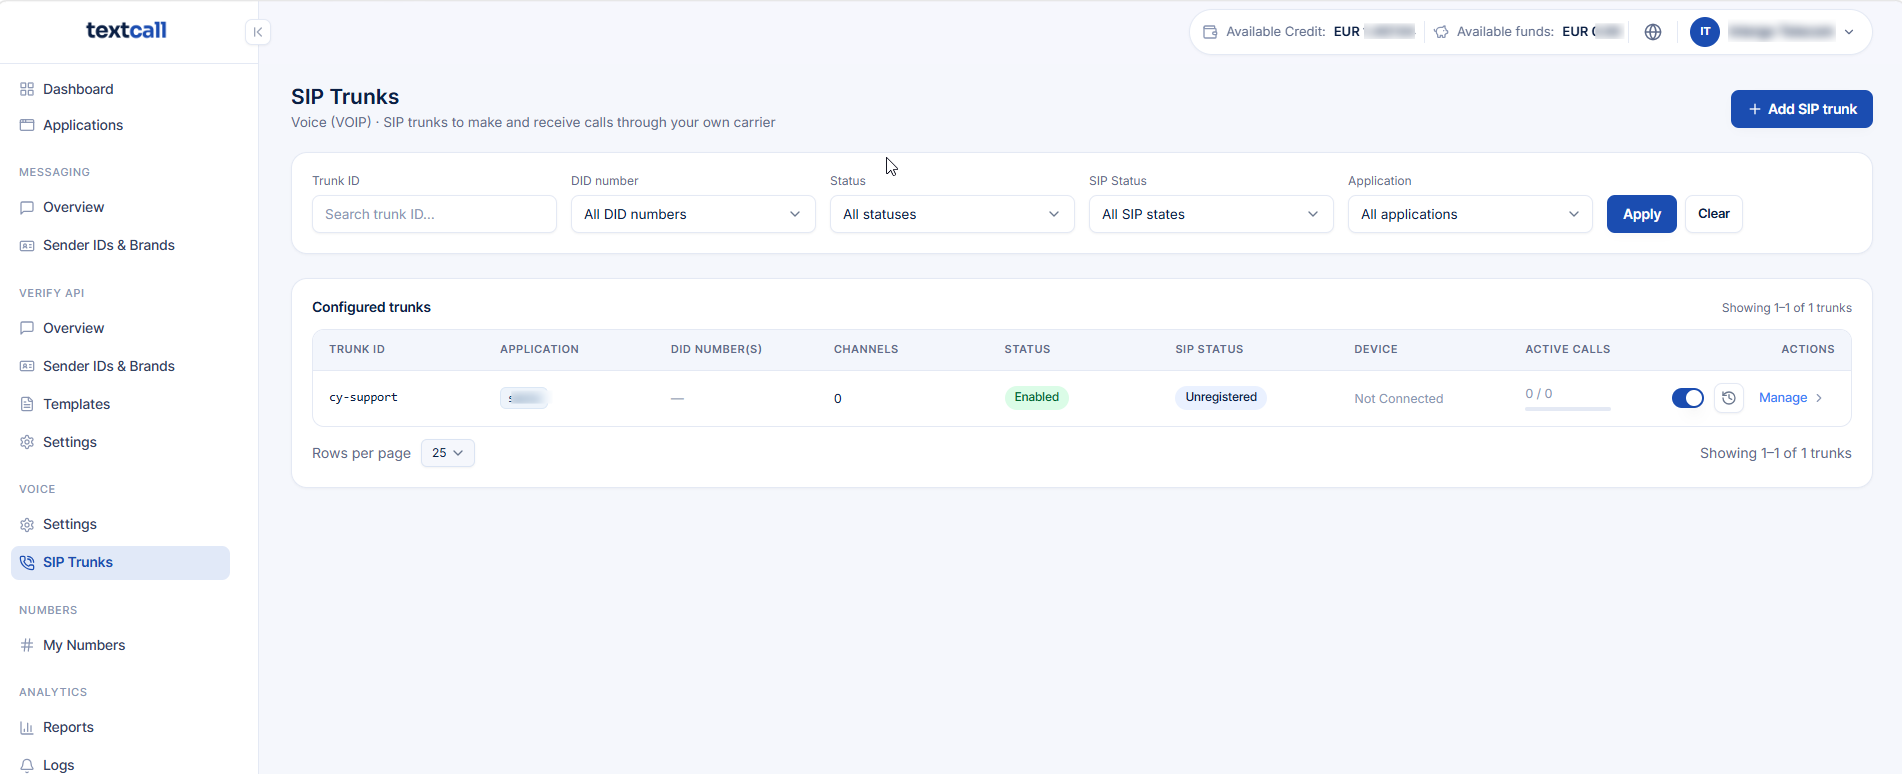
Edit SIP trunk settings
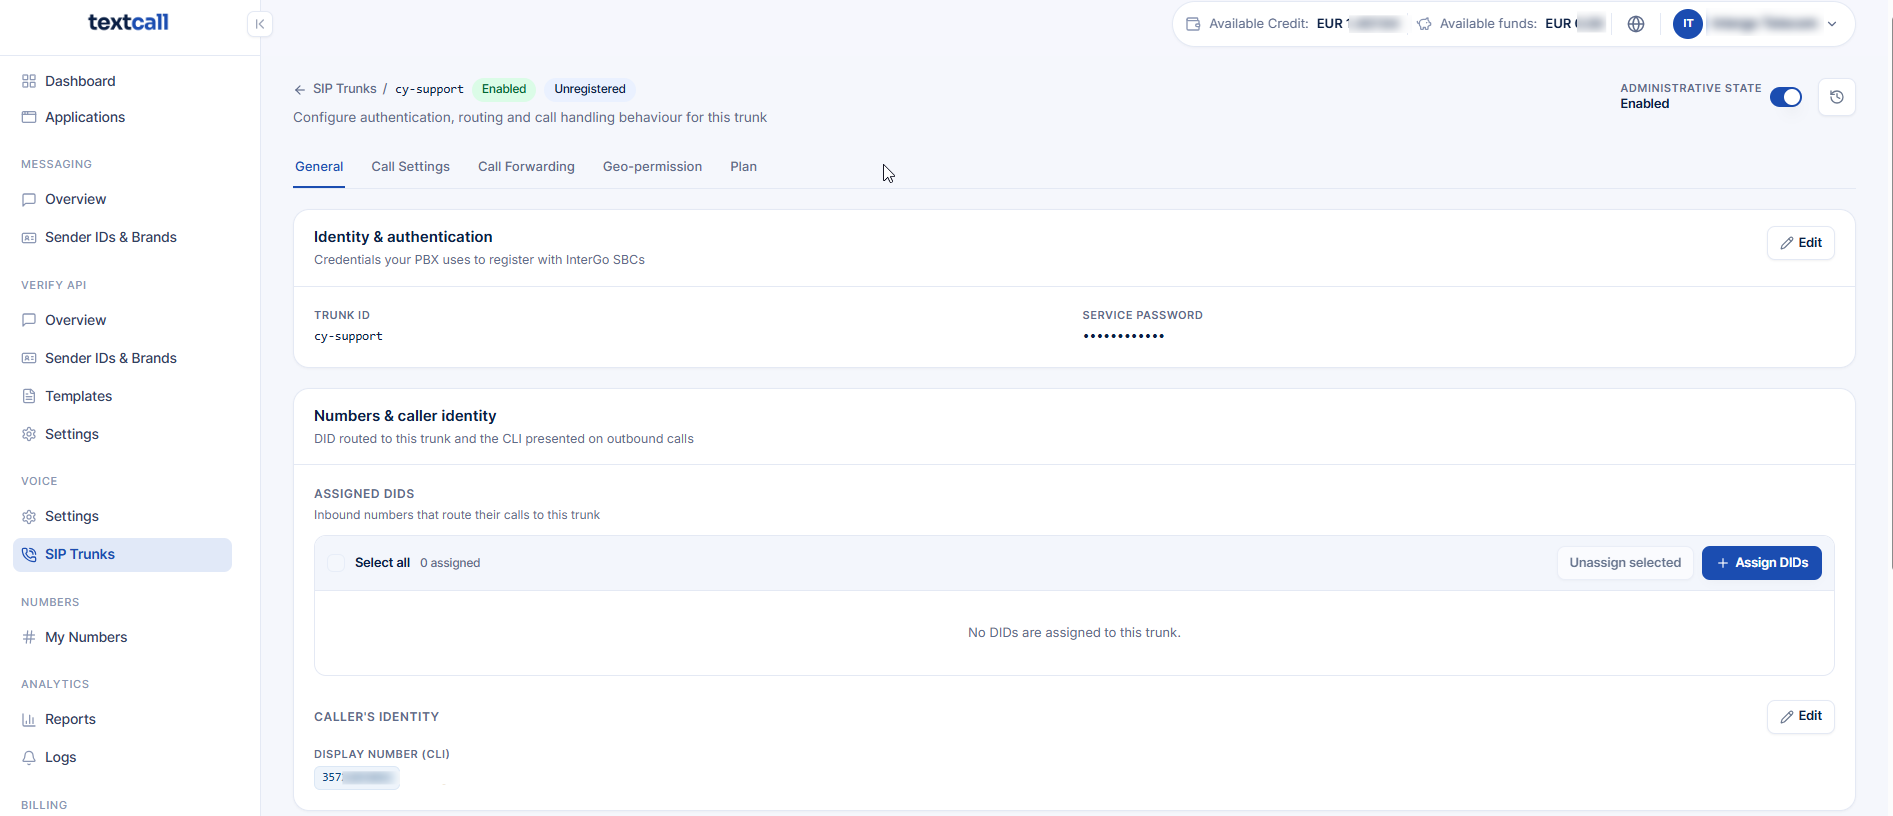
You can change a trunk's settings (password, plan, application, and DID assignments) at any time from the Configured trunks list.
- Go to Voice → SIP Trunks.
- Find the trunk. Use the filters at the top of the page (Trunk ID, DID number, or Application) and click Apply to narrow the list.
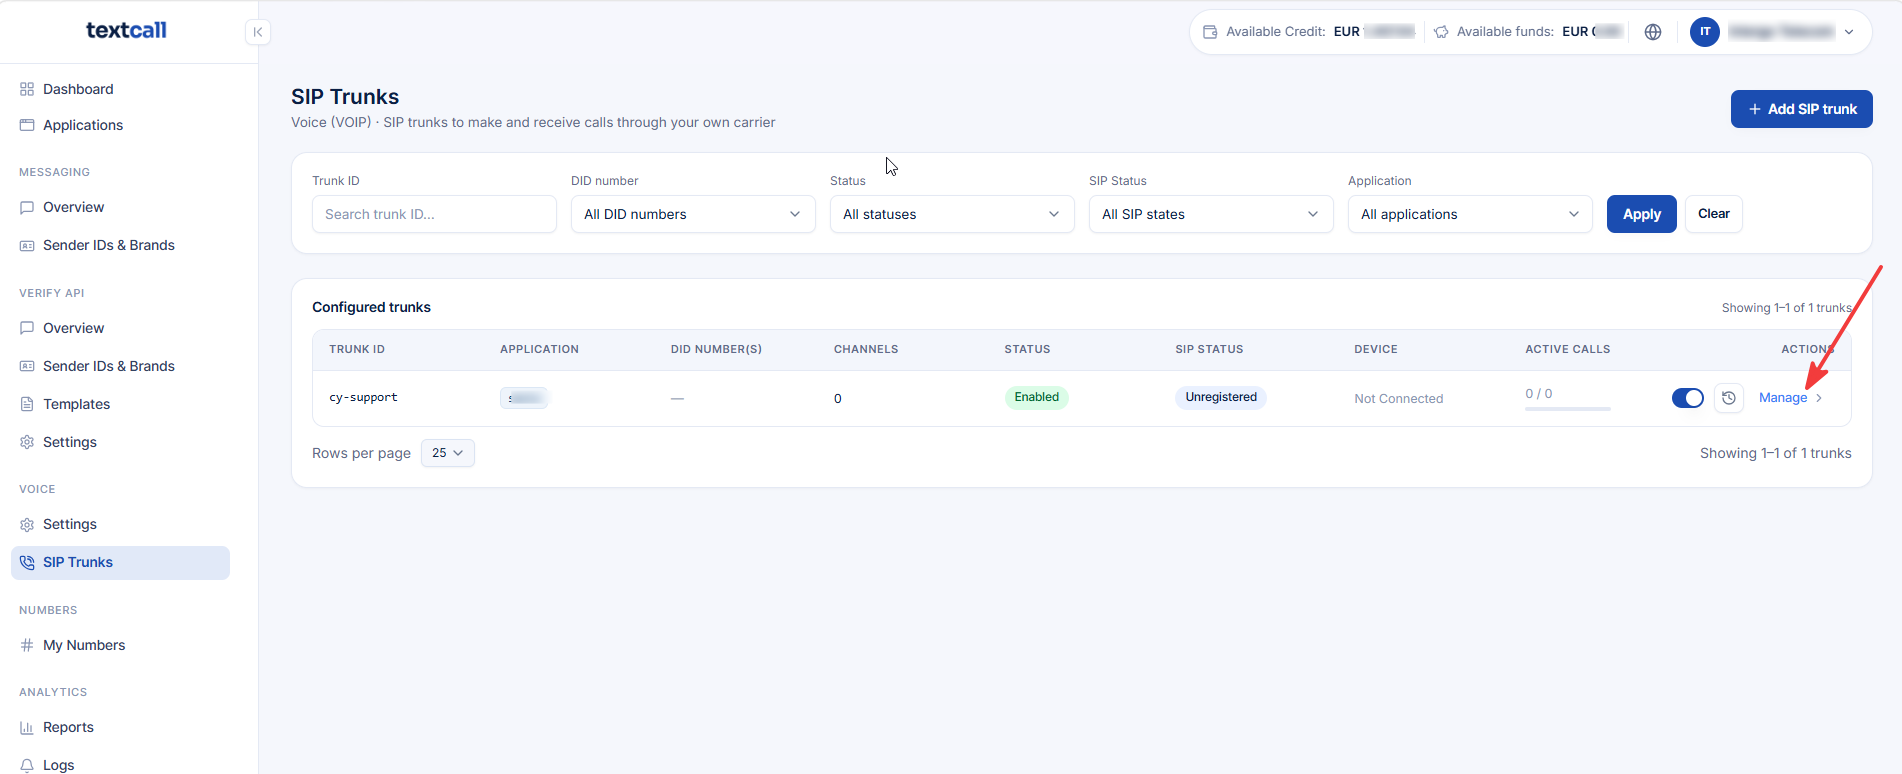
- In the trunk's row, select Manage.
- Update the fields you need, then click Save.
Connect SIP trunk to a PBX
To connect your PBX, create a SIP trunk on the PBX that registers to TextCall with your Trunk ID and password. Outbound calls then leave through TextCall, and inbound calls to your assigned DIDs arrive on the same trunk.
Connection parameters
| Parameter | Value |
|---|---|
| SIP server (registrar) | sip.textcall.com sip-sg.textcall.com sip-za.textcall.com |
| Port and transport | 5060 UDP/TCP |
| Username / auth ID | Your Trunk ID (for example, cy-support) |
| Password | The trunk Password |
| Registration | Required; re-register every 300 seconds |
| Codecs | PCMA/G711 - A-law, PCMU/G711- U-law, G729, Opus |
| Outbound number format | E.164, for example 35799000000 |
| Caller ID | One of your assigned DIDs, in E.164 format |
Generic setup steps
- Allow TextCall traffic through your firewall. Open the signalling port and the RTP media range to TextCall's IP addresses. If your account uses an IP allowlist, add your PBX's public IP to it.
- Create a SIP trunk on your PBX. Enter the SIP server, Trunk ID, password, and transport from the table above.
- Enable registration and save. Confirm the trunk shows as registered in your PBX.
- Create outbound rules that send external calls to the TextCall trunk, formatting numbers in E.164.
- Create inbound rules for each assigned DID
- Place a test call in each direction and confirm audio flows both ways.
Updated 12 days ago
Did this page help you?